

How To Make Designs In Wood Using A Router
Cut Designs on Forest With a Dremel Router
Corrina is a Denver-based fine artist with an MFA in integrated arts who provides tips and tricks on how to become nigh fine art living.
What Is a Router?
A router is a tool used to hollow out a specific expanse from a solid surface such as forest or plastic. By decision-making the shape and depth of the cut, a multitude of possible designs tin be achieved. There is a wide diverseness of routers available on the market every bit well as routing $.25 that can perform big jobs such as furniture making, cabinetry, countertop, and other industrial design applications.
For smaller art-related projects, a smaller router may exist more practical. Dremel makes a router attachment and a diversity of routing $.25 that are like shooting fish in a barrel and constructive to utilise on such projects. Near Dremels that are purchased brand new include a router zipper and a routing flake, but if yours didn't come with one or you lot don't have it anymore, you can find them on eBay for simply a few bucks.
I highly recommend using only bits that are intended for use with the router zipper. Always follow directions included with your particular Dremel model.
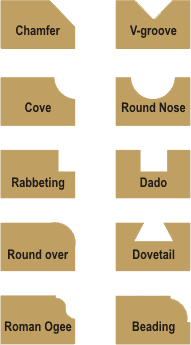
dissimilar router bits cut different shapes.
Wikipedia
What Can Y'all Practise With a Router?
Routers are used industrially for all sorts of applied designs such as the indentations on countertops, in cabinetry, and in the production of furniture. By using specific router bits you can create all sorts of different edges, grooves, and shapes on the surface of wood. The chart above shows some of the various shapes that can exist achieved with some of the diverse routing bits on the market.
I recommend shopping around to discover unique bits and experimenting with them on scrap material until you find the ones that work best for your particular project. Routers can also be used to articulate out a fairly large section of wood, without cutting completely through the surface.
This is useful to create three-dimensional layers in the depth of the wood. This can exist a very useful technique to employ in producing a relief-type carving on the surface of a flat piece of wood. Be creative, experiment, and notice new alternative means for this tool to do good your unique art-making process.
Scroll to Proceed
Read More From Feltmagnet
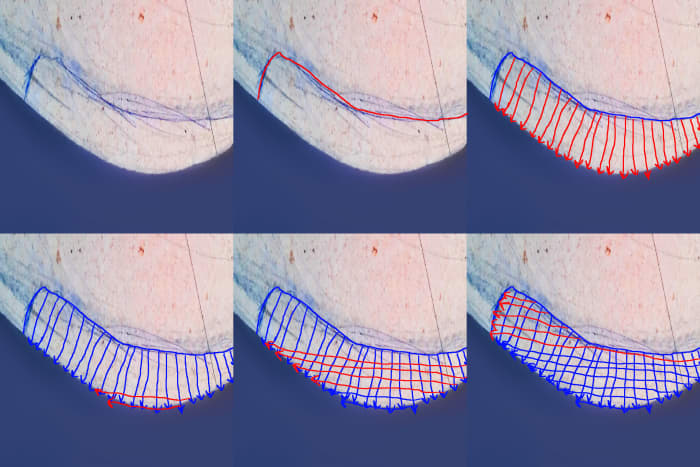
Routing out a big space—follow the lines, work from the outside in towards the center
How to Apply a Router
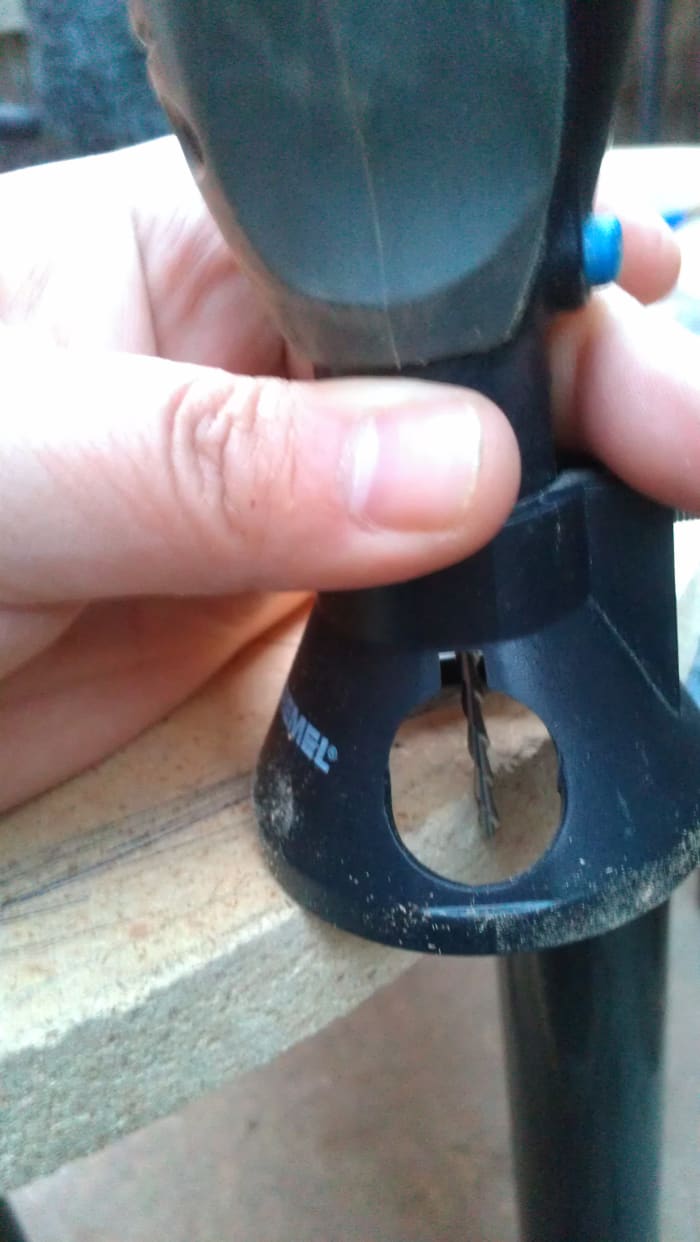
Using the router attachment is fairly piece of cake, but information technology requires a bang-up deal of practice before you can expect to achieve really precise results. I recommend using the router only on flat surfaces and non for freeform carving. The zipper merely screws onto to tip of your Dremel, and the bits are held in the rotating chuck, merely like whatever other scrap.
Routing bits are made at a very specific length to correlate with the measurements on the plastic routing attachment, so it is very important that you let the routing bit slide all the way to the back of the chuck before tightening and utilise. Using either the "mm" or "in" guides on the attachment, you tin adjust the depth on the Dremel router attachment and take as fiddling as 1/16" to an entire 1" off of your surface.
Tips and Tricks
- Routing a direct line: In order to achieve a perfectly straight line with the router, I recommend pulling your Dremel router along a solid direct edge, such as a 2"x4" lath, which has been securely clamped down onto your surface. Never force the Dremel, hold it steady along your straight border, and permit information technology work its way through the material.
- Routing a circle: Use Dremels circumvolve cutting attachment in conjunction with your router zipper to gouge out perfect circles on the surface of your projection.
- Routing out a large space: Whenever you are trying to clear a larger space on the surface of your material, ever start from the outside border and work your way in towards the centre. The reason for this is that you will need at least some border for the router attachment to rest on, or you lot volition run a risk cutting all the way through the surface. Keeping this in mind, outset cut multiple verticle filigree lines near i/4" apart, then showtime making crossing horizontal lines (recollect to work from the outer edge in toward the center), and you should start to pull little square chunks of wood off of the surface. Work dainty and tedious, let the tool practice its work, and you should exist able to clear a large department of surface adequately easily.
- BE Conscientious WITH YOUR DEPTH! If y'all cut away besides much wood, y'all are going to jeopardize the stability of your materials. This is okay within a certain limit, only if you push it also far, your project can become extremely vulnerable or may even only intermission. I think a safety rule of pollex is to NEVER cut deeper than halfway; for example, never cut more than than i/two" deep on a board with a depth of 1" or one/iv" on a board with a depth of one/ii" etc. Some materials are stronger than others, and then this rule tin can be somewhat flexible. Experiment with scraps, get to know your materials, and brand decisions accordingly.
Marie on November 01, 2017:
Thank you so very much for your help! I'thousand refurbishing a 110 years old trunk and i Really needed this!
I do have a question though i can't seem to find saw bits whatever where they do take them correct?
Cheers again !
Ampie on February 16, 2016:
How to get a v groove in the sentre of the wood

How To Make Designs In Wood Using A Router,
Source: https://feltmagnet.com/crafts/How-to-cut-designs-on-wood-surfaces-turn-your-Dremel-into-a-router
Posted by: rowlandamited.blogspot.com
0 Response to "How To Make Designs In Wood Using A Router"
Post a Comment